24 May TP5 Printer – Change to Serial interface
Posted
in Guides
- Go to Printers and Devices
- Right click or touch and hold the printer you want to change (SII PTD00 by default)
- Select the ports tab
- Change the port to COM 3 and press the OK button
- Turn the computer off
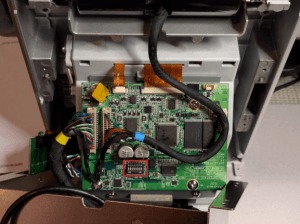
- Remove the four screws from metal housing around the printer and remove the housing
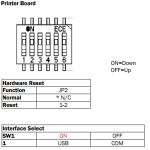
- Swap switch one to Off (up) for serial, or On (down) for USB

- Replace the metal housing and reattach the four screws
- Boot the computer
- Go back to Printers and Devices
- Right click or touch and hold the printer you want to change
- Select Printing Preferences this time
- Click the Advanced button
- Select Function Setup and a button will appear next to them
- Click the Setup button that appears
- A window will open and take a moment to populate
- Once the window populates you may have to set Autocutter to enabled and Peripheral Device to Drawer and Winder
- Click Close
- You may have to change the printer preferences Window to Partial Cut in the Cutter Control setting
- Press the Ok button
- Test everything works by sending a test print


