04 Mar Installing an Ethernet Printer
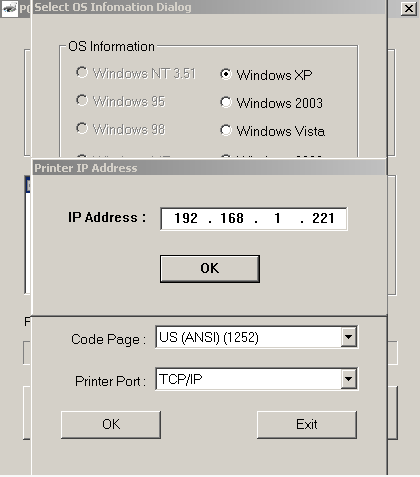
When connecting to an Ethernet printer you need to assign the printer a unique IP address.
For now we can leave this page as is and come back to it once we configure the printer.
To begin we will need to find an IP address that isn’t being used by another device. For this you will need to open a command prompt.
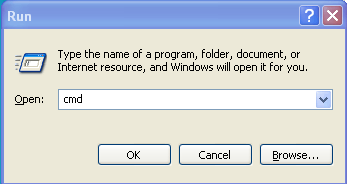
Press [Windows key] + [R]. This will open the run command window. Type cmd in this window.
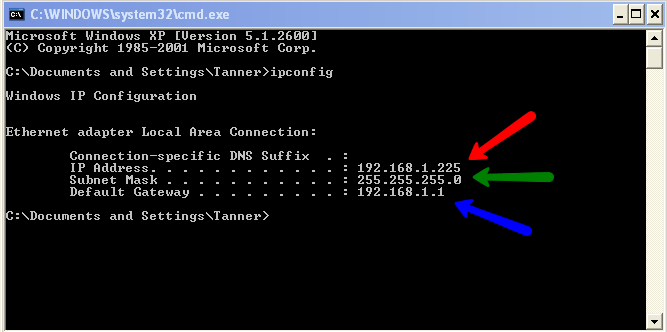
This will open a command prompt window. Type in “ipconfig” in the window.
This will display information of your network. (Note: Your network could be different from the network in this example. The red arrow is the IP address of the computer you are using. (see photo below)
The green arrow marks your subnet mask, this identifies the portion of your IP address that is your network ID using the 255 and the rest indicates the host ID using the 0.
{192.168.1}. {225} – IP address
{255.255.255} {0} – Subnet Mask
{Network ID} {Host ID}
Your subnet mask will determine what portion of your IP address is the network ID and what is the host ID.
{Network ID} {Host ID} {Network ID} {Host ID}
{255.255.255} . {0} {192.168.1} . {225}
{255.255} . {0.0} {192.168} . {1.225}
{255} . {0.0.0} {192} . {168.1.225}
0 and 255 can not be used as the Host ID. This leaves 1 through 254. Since this computer is using 192.168.1.225 then that Host ID can not be used as well. Each device requires it’s own unique Host ID.
You can use 1-224 or 226-254 for the Host ID assuming that those addresses are not in use.
To check if an address is not on in use, you can use the ping command.
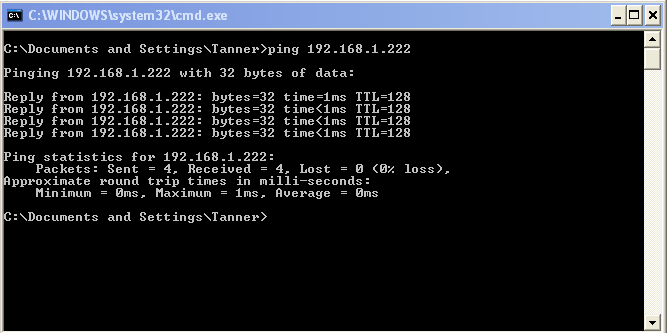
For the purpose of this explanation, lets use 192.168.1.222. Type “ping 192.168.1.222” as shown in the picture below.
As you can see I got a reply from address 192.168.1.222
Now I am going to try a different address to see if it is taken.
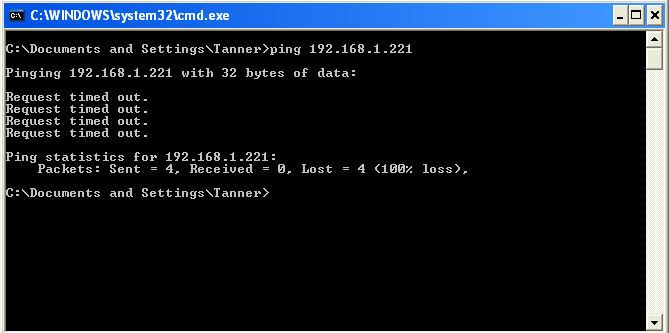
I am going to try “192.168.1.121”
Once again I will run the ping command – “ping 192.168.1.121”
Since the request timed out that means this IP address isn’t being used. Which means we can use this IP address.
Now lets change the IP address of your printer, to an IP address that isn’t being used. In my example 192.168.1.221 isn’t being used so I will use that.
To change it I will use the configuration utility.
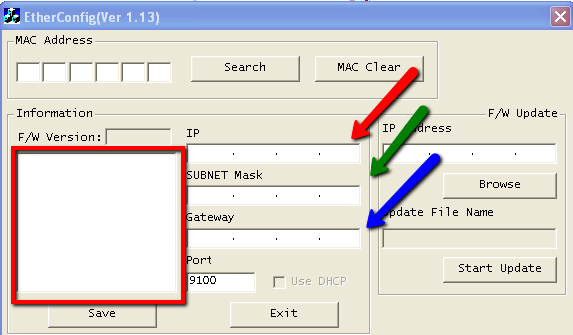
Once you click on search you will see an item listed (possibly more if you have multiple Ethernet printers) indicated by the red box in the image below. Once you click on one of the items. It will populate some information. Here you will change the IP address, subnet mask, and gateway to match your network.
Add the the information based on the arrows.
Red- Add the IP address that is not being used by another device.
Example 192.168.1.221
Green- Add the subnet mask
Example 255.255.255.0
Blue- Add the default gateway
Example 192.168.1.1
Now select Save this will change the settings on your printer.
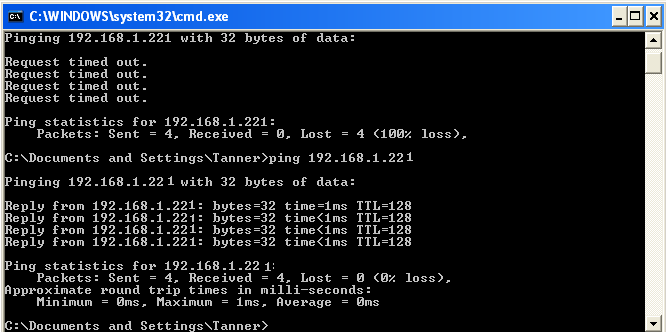
Now you can open up a command prompt or go back to the command prompt to run the ping command one more time.
If you run the ping command you should see a reply from 192.168.1.221
Now that we have the printer’s network settings configured we can install the driver.
We will use the IP address from my example, 192.168.1.221.
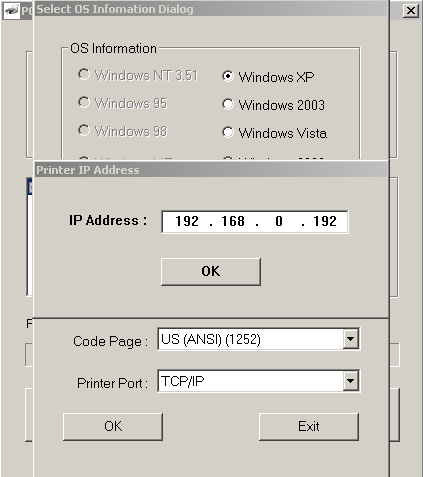
Go back to the window that was asking for an IP address
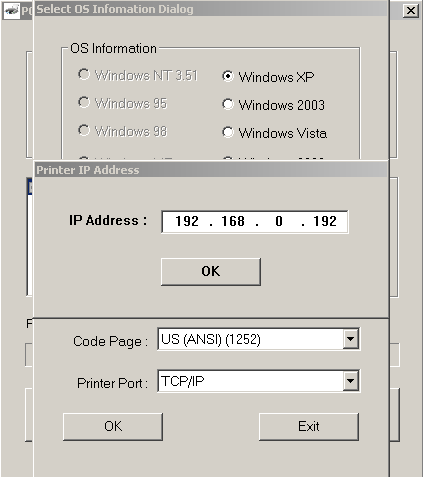
Change it to the IP address you are going to be using. In my example I will change it 192.168.1.221. And select OK.
Click on the picture to move on to Step 2.
